 how-to
How to Maintain Vintage HVAC Equipment: Step-by-Step
Table of Contents
- Why Vintage HVAC Maintenance Is Different
- What You'll Need Before You Start
- Step 1: HVAC Filter Replacement Schedule and Filter Care
- Step 2: Vintage Air Conditioner Cleaning for Coils and Condenser
- Step 3: Ductwork, Vents, and Airflow Checks
- Step 4: Thermostat, Fans, and Blower Inspection
- How to Make an Old AC Work Better Between Service Visits
- Refrigerant, Parts, and Safety on Legacy Systems
- Frequently Asked Questions
Last Updated: October 16, 2026
Why Vintage HVAC Maintenance Is Different
Older air conditioners were built with heavier metal and simpler controls, but they run on parts and refrigerants no longer made the same way.
At Air CareSaver, we have worked on older systems across the San Gabriel Valley for over 21 years.
Vintage units reward care but punish guesswork: a wrong filter, mismatched part, or refrigerant top-off with the wrong type can do real damage.
What You'll Need Before You Start
Gather your tools first so you are not running back and forth mid-job.
What you'll need:
- Replacement air filters in the correct size
- Soft brush and a shop vacuum
- Coil cleaning spray made for HVAC use
Before you touch anything, write down the model and serial number of both the indoor and outdoor units. For older equipment, this record is the fastest way to find compatible replacement parts later.
Time estimate: About 2 to 3 hours for a full routine. Difficulty: beginner to intermediate.
Step 1: HVAC Filter Replacement Schedule and Filter Care
The HVAC filter is the cheapest part to change and the one that matters most. A clogged filter chokes airflow, making the blower work harder and driving up operating costs.
For most homes, check the filter monthly and replace it every 1 to 3 months.
A common mistake is buying a high-density filter for an older unit. Those filters block more particles but also block more air. Vintage systems were designed for lower resistance.
- Check the filter monthly
- Replace every 1 to 3 months
- Match the exact size printed on the old filter
Step 2: Vintage Air Conditioner Cleaning for Coils and Condenser
Vintage air conditioner cleaning starts outside. The condenser unit sheds heat, and when buried in dirt, leaves, and grass clippings, the whole system runs hotter and less efficiently.
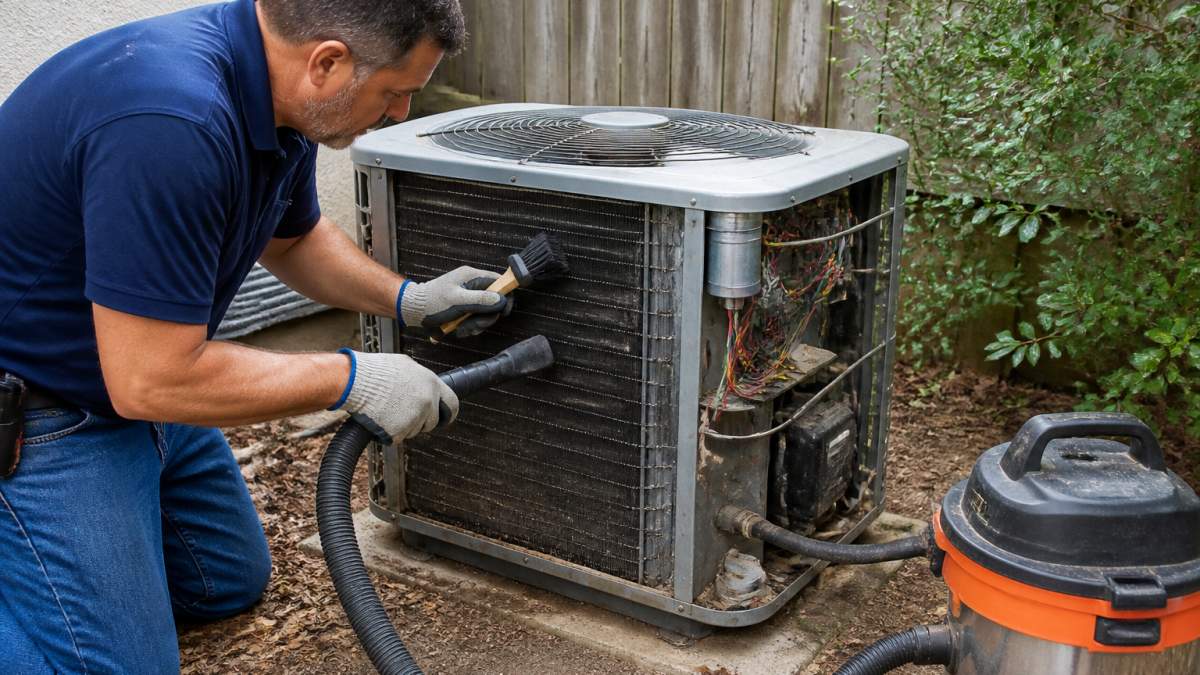
Turn off power at the breaker, then remove the top and side panels.
Inside, the evaporator coil collects dust too. If you can reach it, brush it clean and check the drain pan for standing water.
Step 3: Ductwork, Vents, and Airflow Checks
Weak airflow is usually a duct problem, not an equipment problem. Walk the house and check every vent and return.
- Remove vent covers and vacuum dust from the grilles
- Check that furniture or rugs are not blocking returns
- Look for crushed or disconnected flex duct in the attic or crawlspace
Duct sealing matters more on older homes. Leaky ducts push conditioned air into attics and crawlspaces, so you pay to cool spaces you do not use; sealing those gaps improves efficiency and comfort at once.
Also check insulation on duct runs in hot spaces. Worn insulation lets cold air warm up before it reaches the room. If a run feels cold and sweaty, it needs new wrap.
Step 4: Thermostat, Fans, and Blower Inspection
The thermostat is the brain of the system, and old mechanical models drift out of calibration. If your unit short-cycles or never reaches the set temperature, the thermostat may be the cause.
Start with the basics: replace thermostat batteries if yours uses them, clean the contacts, and compare an older dial model's reading to a separate thermometer. A programmable thermostat is one of the simplest upgrades for an older system, cutting run time when no one is home.
Next, check the fan and blower. With power off, spin the outdoor fan blade by hand, it should turn freely; grinding or wobbling means worn bearings. Inside, check the blower wheel for dust buildup, which cuts airflow and strains the motor.
| Check | What to Look For | Action |
|---|---|---|
| Thermostat | Drifting readings, dead batteries | Replace batteries, recalibrate or upgrade |
| Outdoor fan | Grinding, wobble, stiff spin | Lubricate or replace motor |
| Blower wheel | Dust buildup, imbalance | Clean and rebalance |
How to Make an Old AC Work Better Between Service Visits
You can stretch an older system without touching a wrench by reducing the load it carries and catching small problems before they become compressor-level failures. Vintage units respond well because they were often oversized and lose capacity gradually as coils foul and refrigerant charge drifts.
Load reduction that actually moves the needle
- Close blinds on sun-facing windows during the day; west-facing glass is the largest heat gain in most homes.
- Seal window seals and weatherstripping, a dollar of weatherstripping can outperform a dollar of service on an old system.
- Run ceiling fans to spread cool air, but turn them off when you leave; fans cool people, not rooms.
Vintage-specific efficiency wins
These are the items that matter on older equipment specifically:
- Duct leakage. In older homes, 20 to 30 percent duct leakage is common. Sealing accessible joints with mastic or UL 181 foil tape is one of the highest-return tasks you can do; standard duct tape fails within a season.
- Return air undersizing. Many vintage systems have a single small return. If the grille whistles or the filter pulls inward, the system is starved for air; a technician can measure static pressure to confirm.
- Filter selection. Older systems were designed for low-resistance filters. A high-MERV filter can drop airflow enough to freeze the evaporator coil, so stay at the lowest MERV that protects the equipment.
A vintage-specific seasonal schedule
General checklists do not account for the failure modes of older equipment. Use this one.
Monthly (cooling season)
- Inspect the filter; replace if visibly loaded
- Look at the condensate drain pan for standing water
- Listen for new noises at startup, grinding, clicking, or a hard start
Spring, before first cooling use
- Full filter change
- Outdoor condenser cleaning (power off at the breaker)
- Clear debris within two feet of the unit
Fall, before first heating use
- Replace the filter
- Test the heating cycle and confirm ignition or heat-pump changeover
- Check for any refrigerant oil residue at fittings (a sign of a slow leak)
Annually
- Professional inspection: refrigerant pressures, amp draw on the compressor and blower, capacitor condition, contactor pitting, and a leak check
- Review the service log and note any trend, rising amp draw or falling capacity usually precedes a failure
Keep a service log
A simple notebook or spreadsheet with date, task, technician, and readings turns a vague "it's been running fine" into a real history. On a vintage system, this log is often the difference between a technician diagnosing a problem in 20 minutes versus two hours of guessing.
The single biggest gain for an old AC comes from airflow and load: a clean filter, clear vents, sealed ducts, a clear condenser, and a thermostat that is not fighting the house. Fix those before you spend money on anything else.
Refrigerant, Parts, and Safety on Legacy Systems
This is where vintage equipment separates itself from modern gear. A 1990s split system and a 2020s system can look similar, but the refrigerant, controls, and failure modes differ enough that generic advice can damage the unit or injure you.
Identify the refrigerant before anything else
Start at the data plate on the outdoor condensing unit, which lists the model number, serial number, and factory charge, including the refrigerant designation. Common designations on older residential equipment include R-22 (HCFC-22) and, after the mid-1990s, R-410A; some very old or specialty units used R-12 or R-500.
If the plate is faded or missing, a licensed technician can identify the refrigerant from the service valves, line-set sizing, and operating pressures. This is not a DIY determination.
What the phaseout actually means for you
R-22 production and import for new equipment was phased out in the United States under the Montreal Protocol implementation rules administered by the EPA. Existing R-22 systems are not illegal to own or operate, but:
- Virgin R-22 is no longer produced domestically, so supply comes from reclaimed stock.
- Reclaimed R-22 is legal for servicing existing equipment, but prices have risen sharply and availability varies by region.
- A system needing frequent top-offs has a leak. Under EPA rules, refrigerant cannot simply be vented, it must be recovered by a certified technician, and knowingly venting is prohibited (the EPA).
A common pattern with older systems is a slow leak at the Schrader valves, flare fittings, or the evaporator coil. A technician can pressure-test and locate the leak rather than repeatedly recharging.
Parts: how to actually find them
Discontinued does not always mean unavailable. The workflow that works:
- Record the full model and serial number from both the indoor air handler or furnace and the outdoor unit, and photograph the plates.
- Note the manufacture date encoded in the serial number, most manufacturers use a date code a technician or supply house can decode.
- Search aftermarket suppliers specializing in obsolete HVAC parts; many carry universal replacements for common failure items.
- For controls, contact the original manufacturer's parts line, even discontinued lines often have cross-reference charts to a current equivalent.
- For motors, capacitors, and contactors, match electrical ratings (voltage, microfarads, horsepower, RPM, rotation direction) rather than physical appearance.
Do not substitute a capacitor with a different microfarad rating "close enough." A mismatched run capacitor shortens motor life.
Safety: when to stop and call a professional
Some tasks are safe for a careful homeowner. Others are not, and vintage equipment raises the stakes because insulation and wiring have had decades to degrade.
Stop and call a licensed technician if you see any of the following:
- Cracked, brittle, or cloth-wrapped wiring insulation
- Discolored or scorched wire nuts, terminals, or breaker connections
- A burning smell or any sign of arcing
Never handle capacitors or refrigerant lines yourself. A stored charge can shock you even after the power is off, and refrigerant work requires a license. Call a professional for anything beyond cleaning and basic checks.
Keep a service log. Write down the date, what was done, who did it, and any readings (static pressure, amp draw, refrigerant pressures). On a vintage system, this log is often the difference between a technician diagnosing a problem in 20 minutes versus two hours of guessing.
Preservation versus replacement: a decision framework
This is the real question owners face. Score your system on five factors:
| Factor | Leans toward preservation | Leans toward replacement |
|---|---|---|
| Condition | No major component failures in 5 years | Compressor, coil, or heat exchanger already replaced or failing |
| Repairability | Parts are available or cross-referenceable | Multiple discontinued critical parts |
| Efficiency | You accept higher utility bills | Bills have climbed and you want lower operating cost |
| Comfort | Rooms are evenly cooled | Hot and cold spots, humidity problems, short cycling |
| Safety | No hazardous wiring or components | Deteriorated wiring, asbestos, or unsafe combustion |
If three or more factors lean toward replacement, replacement usually wins on total cost of ownership. If the system is otherwise sound and parts are findable, careful maintenance can keep it running for years and preserve the simplicity and repairability that made it last this long.
A licensed technician can give you a specific read on your unit. Ask for a written assessment covering refrigerant type, leak status, compressor condition, and parts availability, not just a quote for a new system.
Frequently Asked Questions
Can I clean an older air conditioner myself?
You can handle basic vintage air conditioner cleaning yourself: shut off power at the breaker, rinse the outdoor condenser fins with a garden hose, clear debris within two feet of the unit, and change the air filter. Leave evaporator coil cleaning, refrigerant work, and electrical checks to a licensed technician. If you smell burning, hear grinding, or see oil around fittings, stop and call for service.
How often should vintage HVAC equipment be professionally inspected?
Schedule a professional inspection once a year, ideally in spring before cooling season. Legacy systems have more wear and tear on compressors, blowers, and contactors, so annual service catches small issues before they become breakdowns. Ask the technician to check refrigerant pressures, capacitor readings, and duct leakage, and to log the results so you can track the system's condition over time.
When should an old HVAC system be repaired or replaced?
Repair makes sense when the fix is a single component, parts are still available, and the system has not needed repeated repairs. Replacement is worth pricing when the compressor fails, the system uses phased-out refrigerant, or repair quotes approach half the cost of a new unit. Get a written diagnosis and compare both paths before deciding.
How do I tell how old my HVAC is?
Check the data plate on the outdoor condenser unit and the indoor air handler. It lists the manufacturer and a serial number, and most brands encode the production year in the first four characters. You can also look up the model number with the manufacturer or ask a technician during a maintenance visit. Age matters because parts availability and refrigerant type both depend on it.
Vintage HVAC systems can run for years, but only with steady care and honest diagnostics. When a repair is beyond a homeowner's reach, Air CareSaver is here to help. As a family-owned business with over 21 years of licensed experience (#1054832), we offer accurate diagnostics, same-day response, and free estimates so you never pay for guesswork. Get started with Air CareSaver and keep your older system running comfortably year-round.