 how-to
How to Prepare Your HVAC System for Winter: 2026 Guide
Table of Contents
- When to Change Your Furnace Filter Before Winter
- How to Test Your Furnace Before Winter Arrives
- Clear Debris and Protect Your Outdoor Condenser Unit
- Seal Ductwork and Insulate to Stop Heat Loss
- Set Your Thermostat and Test Smart Home Integration
- Benefits of a Professional HVAC Tune-Up Before Winter
- Humidifier Maintenance and Indoor Air Quality Checks
- Conclusion: A Winter-Ready HVAC System Starts Now
- Frequently Asked Questions
Last Updated: September 10, 2026
When to Change Your Furnace Filter Before Winter
As part of your HVAC winter prep, change your furnace filter right before you run the heat consistently, typically in early to mid-fall. A clogged filter forces the system to work harder, driving up energy bills and shortening equipment life. It is the most overlooked part of how to prepare HVAC system for winter, and it takes under five minutes.
A dirty filter restricts airflow, strains the blower motor, and can trigger a mid-winter breakdown.
Signs Your Filter Is Already Clogged
These signals tell you the filter is past due:
- Visible gray or brown discoloration across the pleats
- Weak airflow from supply registers when the heat runs
- Dust accumulating on furniture faster than usual
- A furnace that cycles on and off more frequently
- Higher-than-normal utility bills with no change in habits
Check the filter monthly during heating season. Replace standard 1-inch filters every 1-3 months; thicker media filters last longer (energy.gov). Homes with pets, allergies, or heavy dust need more frequent changes.
How to Test Your Furnace Before Winter Arrives
Run a full test cycle before the first cold snap, not during it. Turn the thermostat to heat and let it run 15-20 minutes, checking ignition, airflow, and whether the system holds a steady cycle without short-cycling or shutting down early.
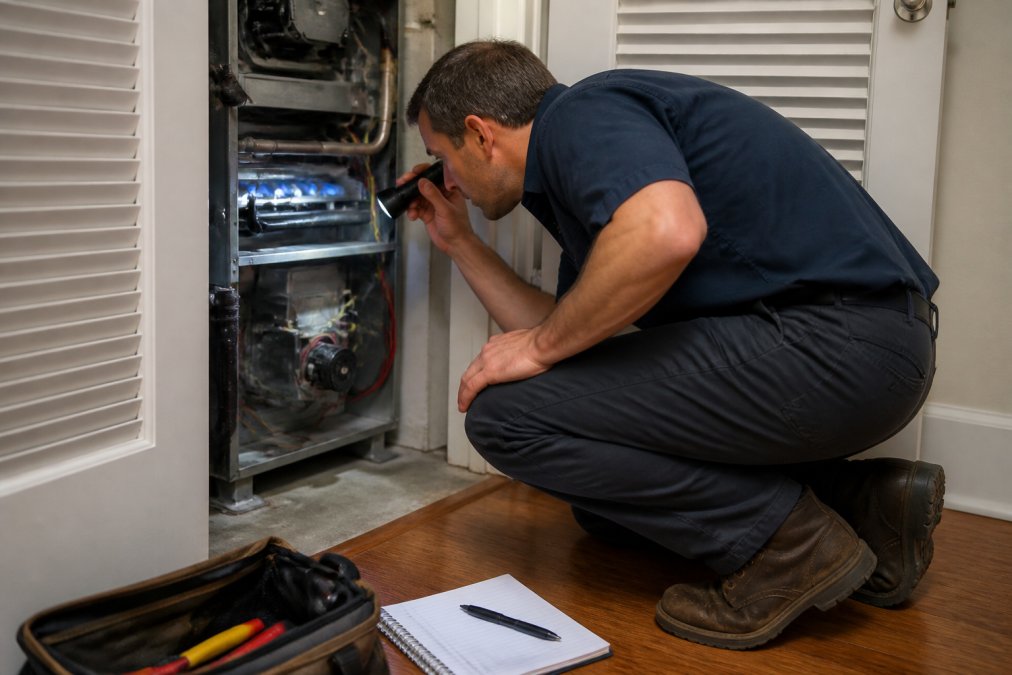
Listen for unusual sounds. A healthy furnace hums low and steady; grinding, scraping, or repeated clicking points to a mechanical issue that needs a technician.
What a Normal Furnace Cycle Looks Like
A properly running furnace follows a predictable sequence:
- The thermostat calls for heat and the inducer motor starts.
- The igniter glows, then the burners light with a soft blue flame.
- The blower motor kicks on after a short delay and pushes warm air through the ducts.
- The system runs until the thermostat setpoint is reached, then shuts down cleanly.
If any step is missing, delayed too long, or repeats without reaching the setpoint, schedule a diagnostic visit. According to the U.S. Department of Energy home heating guidance, heating accounts for a large share of home energy use, so a furnace that short-cycles wastes money every cycle.
Clear Debris and Protect Your Outdoor Condenser Unit
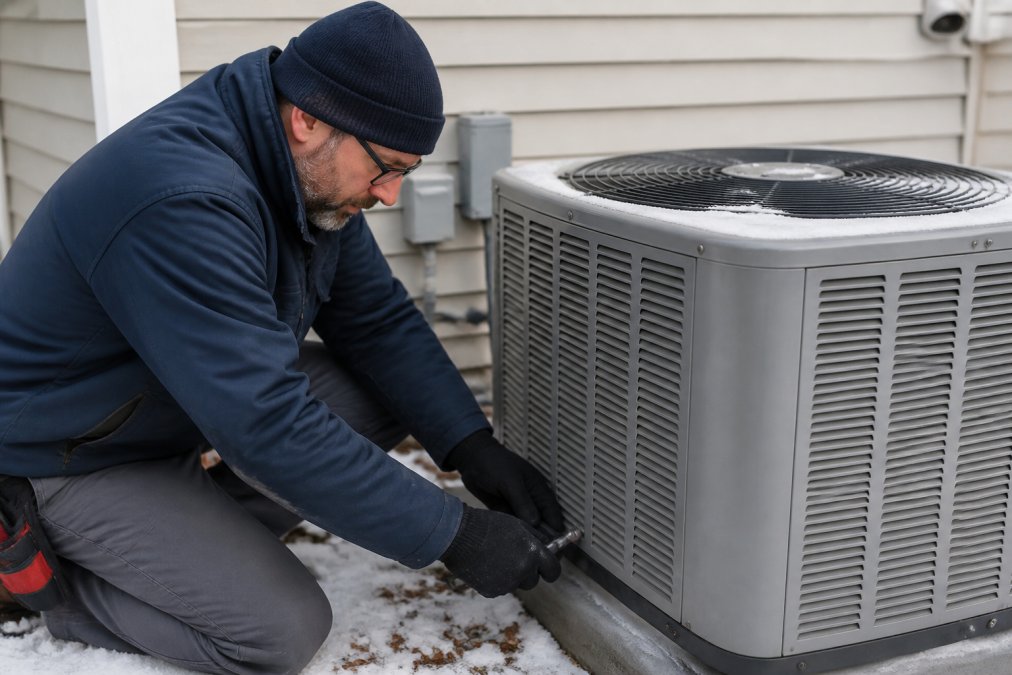
Your outdoor unit needs fall attention whether it is an AC condenser or a heat pump. An AC condenser sits idle all winter, while a heat pump runs in heating mode and must handle defrost cycles, snow load, and ice buildup. Treating them the same is how homeowners damage a compressor.
Start with clearance: at least two feet around the unit on all sides and five feet above it. Leaves, grass clippings, and dirt block airflow, forcing the system to work harder. On a heat pump, restricted airflow during heating mode can trigger repeated defrost cycles that waste energy and stress the reversing valve.
Rinse the coils gently with a garden hose from the inside out. Never use a pressure washer, which bends the delicate aluminum fins and permanently reduces heat transfer. Bent fins can be combed straight with a fin comb, but prevention is easier.
Heat Pump Winter Prep: What Changes
A heat pump pulls heat from outdoor air even when temperatures drop, so it runs all winter. That changes the prep checklist:
- Defrost cycle: The unit periodically reverses to melt frost off the outdoor coil. Steam or a brief cool-down during heating is normal. If the unit ices over and stays iced, that signals a refrigerant or defrost control issue that needs a technician.
- Snow and ice clearance: After a storm, clear snow from around the base and off the top grille, but never chip ice off the coil with a tool. Let it defrost naturally or use warm water.
- Raised mounting: If the unit sits directly on the ground, a technician can raise it on a stand so it stays above snow accumulation and drains defrost water away from the foundation.
- Drainage path: Defrost water must flow away from the unit. If it pools and refreezes, it can block the coil and cause the unit to shut down.
Covering the Unit: When and How
For a standard AC condenser that sits idle, cover the top with a breathable cover or plywood. Do not wrap it in plastic: trapped moisture causes rust, and a sealed unit becomes a nesting spot for rodents.
For a heat pump, do not cover the unit during heating season; it needs unrestricted airflow to run. A top-only cover with open sides can be used during a long idle period, but it must come off before the first heating cycle.
Match Prep to Your Winter
Winter severity changes what matters most:
- Mild winters (short freezes, rare snow): Focus on coil cleaning, clearance, and a functional defrost cycle. Snow load is rarely a concern.
- Moderate winters (regular freezes, occasional snow): Add a raised mounting stand and verify the drainage path stays clear.
- Extreme winters (deep snow, extended freezes): Build a simple windbreak a few feet away from the unit, but never enclose it. Keep the top and sides clear after every storm, and consider a backup heat source so the heat pump is not the sole provider during a cold snap.
A properly prepped heat pump handles cold weather efficiently. One that is covered, buried in snow, or running on a failing defrost cycle will cost more than the prep time.
Seal Ductwork and Insulate to Stop Heat Loss
Leaky ducts can waste a significant portion of the heat your system produces. Walk attics, basements, and crawl spaces looking for disconnected joints, visible gaps, and ducts that have come loose from registers.
Seal accessible leaks with mastic sealant or metal-backed tape, not standard duct tape, which dries out and fails. Focus on joints near the furnace and any ducts running through unconditioned spaces.
Insulation matters just as much. Add insulation around ducts in cold attics and crawl spaces, and check that attic floor insulation is not compressed or missing. A well-sealed, well-insulated system holds indoor air quality and thermal comfort steady even when temperatures drop.
Set Your Thermostat and Test Smart Home Integration
Set a consistent heating schedule before winter arrives: 68°F while you are home and awake, a few degrees lower overnight and when the house is empty. This balances comfort with efficiency without stressing the system.
If you use a smart thermostat, troubleshoot the integration problems that surface when seasons change. Most guides stop at 'check your Wi-Fi,' but the real failures happen during cold snaps, when you are away and the app will not connect.
Troubleshooting Common Smart Thermostat Issues
- Thermostat not responding to app commands: Check Wi-Fi signal strength at the thermostat location and reconnect the device to your network. If the thermostat is on a 2.4 GHz network, confirm your router is broadcasting that band separately from 5 GHz. Many smart thermostats cannot see a combined network name.
- Heating not triggering despite a schedule: Confirm the thermostat is set to "Heat" mode, not "Cool" or "Auto," and verify the schedule is active. Check whether a geofencing feature has decided you are away and is holding the setpoint down.
- Room reads warmer or colder than actual: Move the thermostat away from direct sunlight, drafts, or supply registers, or recalibrate it through the app. Some models let you set an offset of a few degrees to compensate for a bad location.
- Frequent disconnects: Update the thermostat firmware and, if needed, add a Wi-Fi extender near the unit. A thermostat that drops offline during a cold snap cannot protect your pipes or your comfort.
Cold-Snap Failure Modes to Test Now
A smart thermostat only saves energy when it controls the system correctly. Test these scenarios before the coldest night of the year, not during it:
- Power loss recovery: Unplug the thermostat or trip the furnace breaker for a minute, then restore power. Does the thermostat reconnect to Wi-Fi and resume its schedule on its own? If it boots into a default mode and waits for you to fix it, you will come home to a cold house after an outage.
- Internet outage behavior: Disconnect your router for a few minutes. A well-configured thermostat keeps running its local schedule even without the cloud. One that stops heating because it lost the app connection is a liability in winter.
- Low-battery or C-wire issues: Many smart thermostats need a common wire (C-wire) for steady power. Without one, they may steal power from the heating circuit and cause short cycling or random reboots. If you see unexplained reboots, check whether a C-wire is installed or whether the manufacturer offers a power adapter kit.
- Firmware and app version: Update both the thermostat firmware and the mobile app before winter. Older firmware can drop the connection when the router changes channels, which happens more often in cold months when neighborhood Wi-Fi traffic shifts.
- Schedule conflicts with away mode: If you use geofencing or an away mode, confirm it does not override your heating schedule in a way that leaves the house too cold. A common pattern is a thermostat that drops to 55°F when it thinks you are away, then fails to recover because the heat pump cannot keep up on a very cold morning.
A Simple Pre-Winter Test
Run this sequence once in the fall:
- Set the thermostat to heat and raise the setpoint a few degrees above room temperature.
- Confirm the furnace or heat pump starts within a minute or two.
- Open the app and change the setpoint remotely. Confirm the thermostat responds.
- Unplug your router for two minutes, then plug it back in. Confirm the thermostat reconnects without you touching it.
- Check that the schedule you set is the schedule the thermostat is actually running.
If any step fails, fix it now. A smart thermostat that works in October is not proof it will work in January. The cold snap is when you find out, and by then you are troubleshooting in a cold house instead of enjoying one.
Benefits of a Professional HVAC Tune-Up Before Winter
A professional tune-up catches problems while they are small and inexpensive to fix. Technicians clean the burners, inspect the heat exchanger for cracks, test the blower motor, check heat pump refrigerant lines, clear the condensate drain, and verify safe cycling.
Safety matters most: a cracked heat exchanger can release carbon monoxide into your home. A working carbon monoxide detector is essential, but it is a backup, not a substitute for an inspection.
DIY vs. Professional: Where to Draw the Line
Handle these tasks yourself:
- Replacing air filters
- Clearing debris around the outdoor unit
- Cleaning supply registers and return vents
- Adjusting thermostat schedules
Call a licensed technician for these:
- Any work involving gas lines, burners, or the heat exchanger
- Electrical diagnostics on the blower motor or control board
- Refrigerant handling on heat pumps
- Ductwork sealing in hard-to-reach spaces
| Task | DIY or Pro | Frequency |
|---|---|---|
| Replace air filter | DIY | Every 1-3 months |
| Clear outdoor condenser | DIY | Monthly in fall |
| Clean registers and vents | DIY | Monthly |
| Furnace tune-up and inspection | Pro | Annually, before winter |
| Heat exchanger and CO check | Pro | Annually |
| Ductwork sealing | Pro (DIY for accessible leaks) | As needed |
Humidifier Maintenance and Indoor Air Quality Checks
Dry winter air pulls moisture from your skin, throat, and woodwork, and makes your heating system feel less effective. If you run a whole-home humidifier, replace the water panel or pad before the season starts and clean the unit per the manufacturer's instructions.
For portable humidifiers, descale the tank and replace filters. Standing water and mineral buildup breed mold and bacteria that then circulate through your home (the EPA).
While you are at it, check indoor air quality overall:
- Replace carbon monoxide detector batteries and test the alarm
- Clean or replace range hood and bathroom vent filters
- Vacuum supply registers and return grilles
- Consider a higher-MERV filter if allergies are a concern, but confirm your system can handle the added resistance
Poor indoor air quality often traces back to a neglected system, not a dirty house.
Conclusion: A Winter-Ready HVAC System Starts Now
Skipping HVAC winter prep and waiting until the first cold night to think about your heating system is how small issues become emergency calls. Homeowners who avoid mid-winter breakdowns handled filters, airflow, and a professional inspection back in the fall.
If you want that handled correctly, Air CareSaver brings 21+ years of licensed experience (#1054832), same-day response, and free estimates to every job. Our technicians run accurate diagnostics so you are not paying for parts you do not need, and our preventative maintenance plans help prevent expensive breakdowns. With a 4.9 Google rating across 270+ reviews, we have built our reputation on honest work.
Get started with Air CareSaver and head into winter with a heating system you can trust. Get My Free Quote today.
Frequently Asked Questions
How do I winterize my HVAC system?
Start by changing the air filter, then test the furnace by running it through a full heating cycle. Clear leaves and debris from around the outdoor condenser, seal any visible duct leaks, and set your thermostat to a winter schedule. If your system uses a humidifier, clean or replace the pad. For older systems or anything showing strange noises or short cycling, schedule a professional tune-up before the first hard freeze. These steps cover the core of HVAC winter prep and prevent most cold-weather breakdowns.
Should I cover my outdoor AC unit during winter?
A full cover traps moisture and creates a home for rodents, which can chew through wiring. Instead, clear debris from the top and sides, and if you want protection from falling ice, place a piece of plywood across the top only, leaving the sides open for airflow. In areas that rarely freeze, you may not need any cover at all. The outdoor condenser is built to handle rain and snow; trapped moisture is the bigger risk.
How often should I change my HVAC filter before winter?
Change the filter every 30 to 90 days depending on the type and your home's conditions. Before winter, swap in a fresh filter even if it looks clean, because a clogged filter forces the blower motor to work harder and reduces airflow. Homes with pets, smokers, or anyone with allergies should change closer to every 30 days. Check the filter monthly during heating season and replace it when you see a visible layer of gray dust.
What is the $5,000 rule for HVAC systems?
The $5,000 rule is a rough guideline some homeowners use: if a repair costs more than half the price of a new system, replacement may make more sense than repair. It is not a hard rule. Age matters just as much. A 20-year-old furnace with a $2,000 repair is often a poor investment, while a 10-year-old system with the same repair is usually worth fixing. Get a professional diagnostic before deciding, and ask for the expected remaining lifespan of your unit.