 ultimate-guide
HVAC System Troubleshooting Guide 2026: DIY Fixes
Table of Contents
- HVAC Troubleshooting Guide 2026: Where to Start
- Thermostat Issues and Calibration Checks
- Airflow and Filter Maintenance for System Cycling
- HVAC Electrical Troubleshooting 2026
- Refrigerant Leaks, Compressor Failure, and Strange Noises
- DIY HVAC Maintenance Checklist
- When to Call an HVAC Technician
- Repair vs. Replace Decision Matrix
- Frequently Asked Questions
Last Updated: September 9, 2026
HVAC Troubleshooting Guide 2026: Where to Start
This HVAC system troubleshooting guide 2026 from Air CareSaver, a licensed family-owned company with over 21 years of experience across the San Gabriel Valley, prioritizes safety and methodical diagnosis. Before touching any component, shut off power at the breaker and thermostat.
Most breakdowns fall into four categories: thermostat errors, airflow restrictions, electrical faults, or refrigerant and mechanical failures. A system that won't turn on points to power or thermostat issues; weak airflow signals a filter or duct problem; a system that runs but fails to cool often involves refrigerant or the condenser.
Thermostat Issues and Calibration Checks
Thermostat problems cause more false alarms than any other HVAC issue. Check the display first: a blank screen means dead batteries or a tripped breaker, while an unresponsive touchscreen may need a reset. Confirm the system is set to "cool" or "heat" rather than "auto" or "fan only," and verify the setpoint is a few degrees from room temperature.
Calibration drift causes short cycling or constant running. Compare the displayed temperature to a separate thermometer near the unit; a variance beyond two degrees warrants recalibration through the manufacturer's settings menu. Many smart thermostats include built-in adjustments, but older models may require professional attention.
For smart home systems, connectivity issues mimic hardware failures. A thermostat that drops its Wi-Fi signal ignores remote commands but still operates manually. Restart your router, then power-cycle the thermostat. If the issue persists, check for low-voltage wiring damage at the thermostat base.
Airflow and Filter Maintenance for System Cycling
Restricted airflow is the leading cause of premature system failure and poor cooling. A clogged filter forces the blower motor to work harder, raises energy consumption, and can freeze the evaporator coil. Check your filter monthly and replace it when dusty or discolored, typically every one to three months.
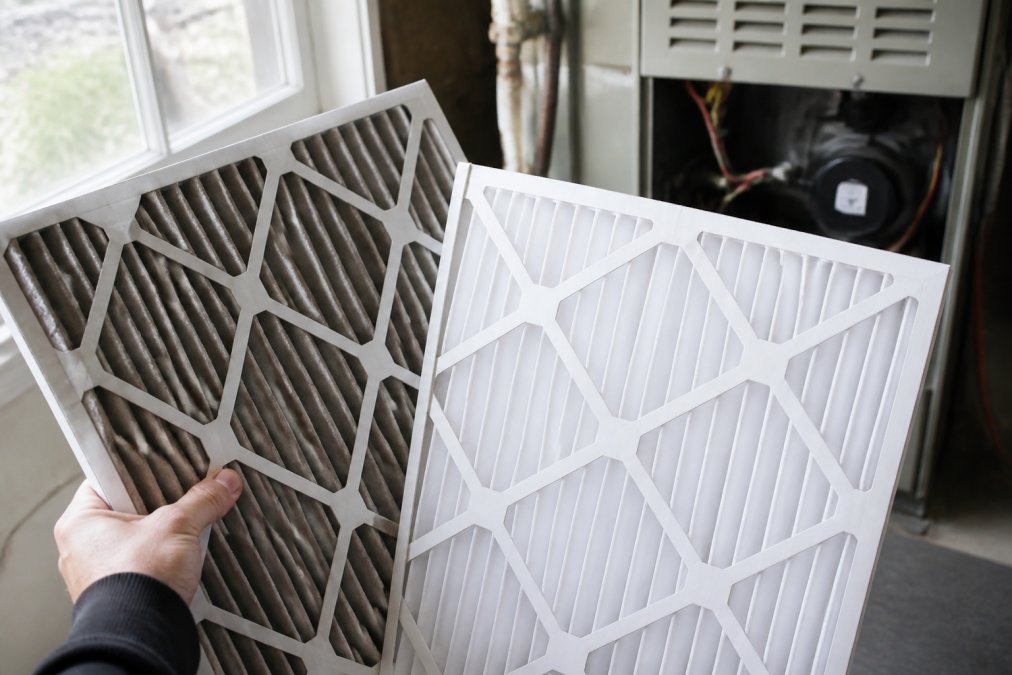
System cycling often traces back to airflow restriction. Inspect return vents and supply registers for obstructions from furniture or debris. The outdoor condenser needs at least two feet of clearance on all sides; overgrown shrubs and leaves block heat dissipation and trigger the high-pressure switch.
Ductwork leakage compounds airflow problems, especially in older homes. Seal visible gaps at joints with metal tape, not duct tape. A blocked condensate drain line also causes shutdown; pour a cup of white vinegar through the drain access point quarterly to prevent algae buildup.
HVAC Electrical Troubleshooting 2026
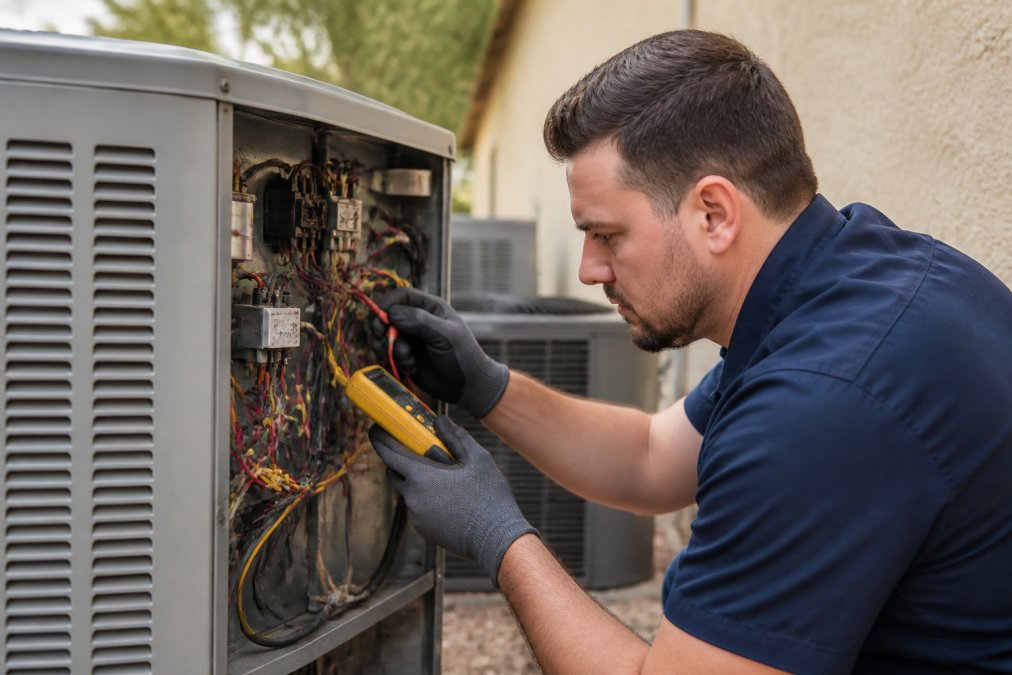
HVAC electrical troubleshooting 2026 begins with understanding the split-voltage design: the thermostat uses low-voltage wiring (24 VAC), while the compressor and blower motor run on line voltage (120V or 240V). Before testing, ensure the system is off at the breaker and use a non-contact voltage tester to confirm power is absent.
Testing the Low-Voltage Side
Remove the thermostat faceplate and use a multimeter set to VAC to check for 24V between the R and C terminals. A 0V reading indicates a blown low-voltage fuse or tripped safety switch; below 18V suggests a failing 40VA transformer. Smart thermostats like the Nest Learning Thermostat or ecobee SmartThermostat often require a C-wire for continuous power; without it, they may power-cycle or fail to energize the contactor.
The Contactor and Capacitor: The Dynamic Duo
The contactor is a magnetic relay that sends line voltage to the condenser fan and compressor. A failing one shows pitted or burnt contacts. With the system off, set your multimeter to ohms (Ω) and check continuity across the terminals; a reading of infinity (OL) indicates an open coil requiring replacement. Coil resistance should typically read between 5 and 20 ohms.
Capacitors are rated in microfarads (µF) and are often dual-run (e.g., 45/5 µF). A reading more than 6% below the rated value means the capacitor is weak and should be replaced. A bulged top or leaking oil is a definitive failure sign.
High-Voltage Diagnostics: The Blower Motor
The blower motor is often a PSC (permanent split capacitor) or ECM (electronically commutated motor). For a PSC motor, check the run capacitor (typically 5-10 µF) and winding resistance; zero ohms between common and run indicates a shorted winding. ECM motors, standard in 2026 high-efficiency units, use a 16-pin or 4-pin connector and control module; check for a blinking LED code to diagnose faults like a locked rotor or wiring error.
The Safety Switches You Must Not Skip
Modern systems have multiple safety switches that can interrupt power. The float switch in the condensate pan opens the low-voltage circuit when water rises, preventing flooding. The high-pressure switch (typically tripping at 600 PSI) and low-pressure switch (tripping at 40 PSI) are wired in series with the compressor contactor coil (ashrae.org). Testing these switches for continuity is critical; a tripped safety switch is often the root cause when the thermostat and transformer are fine.
Wiring and Grounding Issues
Low-voltage wiring issues, often caused by rodents, produce erratic behavior across components. Inspect the wiring bundle for exposed copper or gnawing. A poor ground connection can cause nuisance tripping; verify continuity between the ground bus bar and the unit's chassis. If your system lacks a common wire for a smart thermostat, a plug-in power adapter (like the Venstar Add-a-Wire) is a safe workaround.
A Step-by-Step Diagnostic Path
- Verify power: Check the breaker and disconnect switch for the condenser.
- Check the thermostat: Confirm 24VAC between R and C at the thermostat base.
- Inspect the control board: Look for a blown fuse (usually a 3-amp or 5-amp automotive-style fuse) and replace if necessary.
- Test the safety switches: Check continuity on the float switch and pressure switches.
- Test the contactor: Check for 24VAC at the coil terminals; if present, check for line voltage on the load side.
- Test the capacitor: Use the capacitance setting on your multimeter and compare to the rated µF.
- Test the motor windings: For PSC motors, check resistance between common, run, and start terminals.
Following this sequence isolates the failure point without random part swapping, saving you time and the cost of unnecessary replacements.
Refrigerant Leaks, Compressor Failure, and Strange Noises
Refrigerant leaks and compressor failure are the most serious and expensive HVAC problems. A system low on charge blows warm air, ices up the evaporator coil, and runs continuously. Refrigerant never "wears out"; a low charge always indicates a leak. Only an EPA-certified technician can locate and repair the leak, then recharge the system.
Compressor failure announces itself through distinct symptoms. A humming sound without the compressor starting suggests a failed start capacitor or seized compressor. If it draws excessive current and trips the breaker, the internal winding has likely shorted. Replacement often costs nearly as much as a new system, making the repair-versus-replace decision critical.
Strange noises provide valuable clues. Screeching from the air handler indicates a failing blower motor bearing; clicking from the outdoor unit suggests a faulty contactor; hissing or bubbling near refrigerant lines points to a leak; rattling often means loose panels or debris. Each pattern narrows your diagnostic path.
| Symptom | Likely Cause | DIY Fix | Call a Pro |
|---|---|---|---|
| No power, blank thermostat | Dead batteries, tripped breaker | Replace batteries, reset breaker | Persistent electrical faults |
| Weak airflow | Clogged filter, blocked vents | Replace filter, clear obstructions | Ductwork leakage |
| Short cycling | Thermostat calibration, airflow restriction | Recalibrate thermostat, clean condenser | Refrigerant issues |
| Warm air, ice on coil | Low refrigerant charge | None | Leak repair and recharge |
| Buzzing from condenser | Failing contactor or capacitor | None | Component replacement |
| Screeching from air handler | Worn blower motor bearing | None | Motor replacement |
DIY HVAC Maintenance Checklist
Preventative maintenance prevents most emergency breakdowns. The checklist below covers tasks homeowners can safely perform, with recommended frequencies based on industry best practices.
- Replace or clean air filter every 1 to 3 months
- Clear debris and trim vegetation around the condenser unit monthly
- Check condensate drain line for clogs quarterly
- Clean evaporator coil access panel and inspect for frost buildup seasonally
- Verify thermostat operation and calibration before each season
- Inspect visible ductwork for leaks or damage annually
- Schedule a professional tune-up before summer and winter peaks
Systematic maintenance also improves efficiency. A clean system operates closer to its rated SEER; dirty coils and restricted airflow force longer run times, increasing bills and accelerating wear. Consistent schedules yield fewer mid-summer failures and more predictable energy costs.
When to Call an HVAC Technician
Call an HVAC technician immediately if you smell burning wires, detect a gas odor, or see sparks near electrical components, these indicate imminent fire hazards. Refrigerant handling, compressor diagnostics, and major electrical repairs all require licensed expertise.
When you call for service, provide your complete symptom history: when the problem started, whether the system cycles or runs constantly, and any unusual noises. This accelerates accurate diagnostics and reduces unnecessary parts replacement.
Air CareSaver brings over 21 years of licensed expertise to every service call. We diagnose the actual problem without pushing unnecessary parts, offer same-day response across the San Gabriel Valley and free estimates, and hold a 4.9 Google rating across 270+ reviews.
Repair vs. Replace Decision Matrix
Deciding whether to repair or replace a failing system requires weighing factors beyond the immediate repair cost. The age, efficiency rating, and breakdown frequency all influence the calculation. A system older than 15 years with a low SEER rating often costs more to keep running than to replace.
The 5,000-Hour Rule: A Unique Financial Framework
Most guides stop at the '50% rule' (replace if the repair costs more than half the replacement price), but that rule is too blunt. A more precise approach calculates cost per operating hour.
Quantifying the Energy Efficiency Gap
Energy efficiency also drives the replacement decision. Modern systems achieve SEER ratings of 16 or higher, compared to SEER 10 or lower in older units. Energy savings from an upgrade often offset a significant portion of the installation cost.
To quantify this, consider the potential energy savings. Property owners in older homes built in the '80s or earlier frequently find that replacement delivers better comfort and lower utility bills than continued repairs.
The Refrigerant Cost Trap
Consider the refrigerant type. Systems using R-22, phased out due to ozone-depleting properties, face rising costs and shrinking availability; a leak often makes replacement the more economical choice (the EPA). Newer systems use R-410A, which remains widely available.
However, the EPA's AIM Act is driving a phasedown of high-GWP refrigerants like R-410A, with new systems using A2L refrigerants like R-454B or R-32. A system installed today with R-410A may face availability constraints in the future; factor this into repair decisions on older R-410A systems.
The 3-Strike Rule for Breakdown Frequency
Beyond the numbers, track your breakdown history. If you have had multiple service calls in a short period, the system may be signaling systemic failure. The probability of further failures is high, and cumulative repair costs could potentially exceed a new system.
| Factor | Repair Makes Sense | Replace Makes Sense |
|---|---|---|
| System age | Under 10 years | Over 15 years |
| Repair cost | Less than one-third of replacement | More than half of replacement |
| Breakdown frequency | First major repair | 3+ failures in 24 months |
| Efficiency | SEER 13 or higher | SEER 10 or lower |
| Refrigerant type | R-410A available | R-22 phased out |
| Comfort issues | Isolated fix needed | Inconsistent temperatures throughout |
| Cost per operating hour | Lower | Higher |
Frequently Asked Questions
What is the most common problem with HVAC systems?
Airflow restriction from a dirty filter is the most frequent cause of HVAC failure. A clogged filter blocks airflow, forcing the blower motor to work harder and causing the evaporator coil to freeze. This restricts cooling and can lead to system cycling. Check your filter monthly and replace it every 1-3 months to prevent most breakdowns and improve HVAC efficiency.
What are some basic steps to troubleshoot an HVAC system?
First, check the thermostat and set it 5 degrees above room temperature. Verify the system switch is on and the circuit breaker hasn't tripped. Replace a dirty air filter and clear debris from the outdoor condenser unit. If the system still won't start, inspect the drain line for clogs. These basic HVAC troubleshooting steps resolve many common issues before you need professional help.
What is the most common part to fail on an AC unit?
The capacitor is the most common part to fail on an AC unit. This component stores energy and gives the compressor and blower motor the initial jolt they need to start. Symptoms include a humming sound from the unit or a system that won't start at all. While replacing a capacitor is a simple fix, it involves high-voltage wiring, so it is safest to have a licensed technician perform the repair.
When should you call a professional for HVAC repairs?
Call a professional when you suspect a refrigerant leak, compressor failure, or an electrical fault. These issues require specialized tools like manifold gauges and voltage testers. Strange noises like grinding or hissing, ice on the lines, or a system that trips the breaker are also signs to call an HVAC technician. Attempting these repairs without training can be dangerous and void your warranty.
How can I improve my HVAC system's efficiency in 2026?
Start with a DIY HVAC maintenance checklist: replace filters monthly, clean the outdoor condenser unit, and ensure vents are unobstructed. For bigger gains, consider a smart thermostat for better scheduling. If your system is over 15 years old with a low SEER rating, an upgrade to a high-efficiency model can improve energy efficiency and potentially reduce energy bills. Schedule a professional tune-up to check refrigerant charge and ductwork leakage.
Diagnosing an HVAC problem requires patience and a methodical approach, but you do not have to navigate it alone. Whether you need a quick fix, a professional diagnosis, or guidance on upgrading an aging system, Air CareSaver delivers accurate, honest solutions backed by 21 years of licensed experience and same-day response. Get My Free Quote and restore year-round comfort to your home or business without the guesswork.